December 22, 2011

Christmas Pincushion tutorial...the last one..:O)

 Finally..
here it comes the last instructions for the pincushion...:o)

Cut a 1 3/4" x about 23" strip

*Sew this strip to the side of the pincushion...
(havent figured out the length of the stip... time..flies...:O)
But I did like this...
I started a little bit in on the strip ..sewed almost until the end...
pinned the ends together...
*then I sewed the ends together... 
*Split the seam and continue to
 sew the opening shut... 
 Now it should look like a little hat..:O)

Inside...

Outside...

*Use Template C to cut out a bottom
( you can use a a fusible interface here if you want a sturdy bottom)

*Pin the bottom evenly around the pincushion..
start with four pins and add more...

*Use the rest of the ric rac...
lay it between the layers... 
start a little bit in on the ric rac...

You can see on the picture that the top of the ric rac is just
 touching the outer edge of the side of the pincushion...

*Tuck the ric rac in while sewing....and
keep on sewing like this until the end...
tuck the ends in and continue sewing  the opening shut.

*Make an innerbag in some scrap fabric...
( wont show) 
(use template C ... make it a seam allowance smaller)

*Fill the innerbag with some filling..
(walnut shells...rice or something with weight)

*Sew the opening shut on the machine...
dont bother to turn ...raw ends out..;O)

Turn the pincushion inside out...
tuck the innerbag inside..
and start filling the pincushion with polyester fill..
nice and firm..!!!!

And sew the opening shut by hand..
Nicer that way!!!

And voila.. FINISHED!!!!
There you have a new pincushion just in time for Christmas!!!:O))

Close up ..again..:O)

From the side...

And a picture of the finished one!!!

With this I want wish you all 
A VERY MERRY CHRISTMAS...

And please if you make the pincushion...
do send me a picture so I can see what you made..
Im so curious!!! :O)))


December 20, 2011

Christmas Pincushion tutorial... part 2

 ok.. ready for part two...:O)

Christmas Pinchushion 
part two

Close up again..;O))
Now it´s time to prepare the stitchery for the applique
I did try first with just to needle turn the stitchery to the pincushion
So I show some pictures of that first if some one wants to do that.

(Needle turn method)

I used my lightboard to center and to see 
that the stitchery become the right size 
Then I used the needleturn method to
 stitch it to the top of pincushion..
but when finished I wanted to add some ric rac ...
 so I ripped it up...;O))) 
HAH...can´t do anything right from the beginning..LOL...

Picture below shows the stitchery added with needle turn..
see....it needs something more..:O)
So ...of course I forgot to take some pictures
 of the next step...
bummer...

Lazy method..;O)
Do like this:
Make templates

Template B in cardboard (cereal package)
Template A and C in freezer paper

*Use Template A (freezerpaper) to center the stitchery 
and cut around the outer line of the freezerpaper.

*Peel the freezer paper away and thread a needle
 and make a running stitch in outer edge
 and lay the cardboard template in the middle
 and pull the thread to gather the stitches around the template.
Did you get a nice and round stitchery???
Hope so..:O)

*Press it carefully to keep it´s form and take out the template...


*Start adding the ric rac with leaving a little tail in the beginning
 and just tuck the ric rac in while sewing around the stitchery
when coming to the end...overlap the two ends nice and end the seam.
Now it should look like this..:O)

 *Use template C (freezer paper)...
center it on the top of pincushion 
and cut around the outer edge of template...
 Hope you got all this..with my SWENGLISH!! :O)

Time to rest and some dinner for me...
See you all tomorrow with the last tutorial..:O))


December 19, 2011

Christmas Pincushion tutorial...part 1

Here we go...
A Christmas Pincushion!!!!
Promise I will show more of it later..;O)
Hope you will try and make one...
This is my version... 
or the Christmas Style one!!!
(made one earlier that I havent showed on my blog just on Rosalie Quinlans blog)
But I love it so much and decided to share how to make one with you!!

You will need this:

* 20 scrap pieces ...around 2 1/2" big
(I used 10 different and 10 same)
*Strip 2"x 24"
*and 8" x 8" piece of fabric
*some ric rac ( around one meter) 
and some scraps for the innerbag
And of course the stitchery..:O)
5 x 5"piece of for for the stitchery
interfacing
and dark red DMC thread


*First you have to make the stitchery...
Download the stitchery here... or at my sidebar.

*I used a white piece of cotton about 5"x5" big
*Dark red DMC thread 
and I sewed with two strands 

*Prepare the cotton with some kind of fusible interface before stitching
I used a hoop but can easily be sewn with out...

Fabrics:
I used Mary Engelbreits Isn´t Christmas Jolly? 

If you have a Dresden ruler use it 
and cut out 2 1/2" wedges

if not you can use my template..

You will need 
*10 red/white check pieces
*10 other pieces of your choice


Thread your machine and start sewing!! :o)
*Pair the wedges up
(Checkered fabric at the bottom/ print on top)
I have used a 1/4" seam allowance 
Chain piece all the pieces  
*Cut them apart and fingerpress against 
the red checked fabric
*Continue to sew into larger parts...
two by two into a four piece
Fingerpress against the red checked fabric
(I wanted the red checked fabric to stand out a bit)
*Continue to sew the parts together until you 
have a nice and flat circle
*Press it carefully...dont use so much steam...

Well I think I have done enough with my thumb right now 

so I will be back with part two later...;O)


December 18, 2011

Start to gather your fabrics....

Tutorial for what I made with these fabrics
will soon be up ...:O)
So if you want to join in.. you can 
start to look for fabrics...
Dive in to your scrap bin because all the pieces are small..:O)
*Around 2 1/2" ... 20 pieces 
(I used 10 different and 10 same)
*Strip 2"x24"
*and 8x8" piece of fabric
*some ric rac ( around one meter) 
and some leftovers 
And of course the stitchery..:O)
Just give me some time
right now my thumb looks like this :o(
Been to the Doc and are waiting on some test results...
well well.. 
so no sewing for me now...

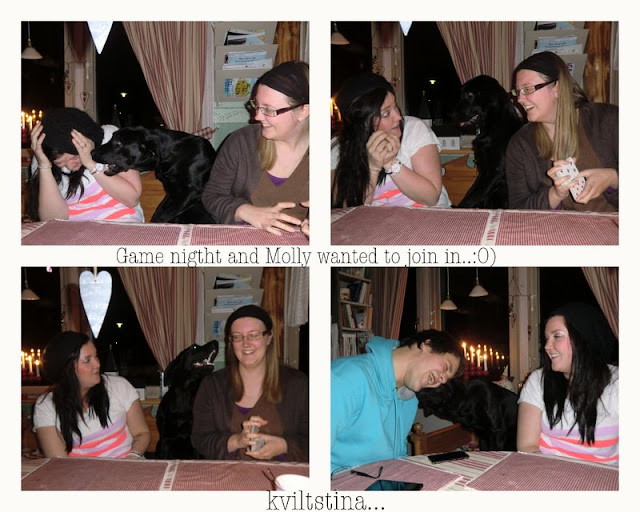
Have had some fun nights with family...
(Linda is back home from Italy...:O)
playing games...so lots of laughing here.. and 
Miss Molly loves it..:O)

Fourth Advent today...
 and I have opened up my last gifts 
from my friends Marica and Louise...
And once more I have had the pleasure to open up wonderful gifts...
A gorgeous necklace from Marica..
(have it on right now.. my old one have broken so it was perfect!!)
And a sweet angel from Louise..:O)

Thankyou Girls for all the lovely Sundays
and my sweet gifts!!

Over and out with some pics of 
my sweet bed companion...
She always use the pillow...;O)

and one morning... she greeted me with this 
BIG YAWN...;O)
Have a wonderful time out there...


December 15, 2011

Paper Hearts Tutorial

Hello again...:O)

I´m just feeling sooo giving .... 
so after several questions on how to make my cute paper hearts for the little Christmas tree...
I decided to make a little HOW TO make them...

Step 1: 
*Find a book...
(not to old, because then the paper will brake when folding the hearts)
For one heart you will need:
*Your Sewing machine...
*A template (just draw a heart out on a piece of paper the size you want)
* Three pieces of paper for the heart
* One wooden pearl ( or whatever you wish..:O)
*Stack the three pieces on top of each other
with the template on top... 

Step 2: 
*Cut out the heart using scissors 
(don´t mark...it will not look good with pencil marks)
Never mind if it becomes a little uneven...
handcraft ..you know..;O)

Step 3:
*Thread your machine with the desired thread
( I used white)
*Draw out some start thread
(enough for making the hanging loop)
*Set your needle in down position
*Line the three layer hearts against the needle
*Lower the pressure foot

*Start sewing
(I used 2.2 stitch length)
*Stop at the end of heart

Step 4:
*Draw out the heart so some thread will follow
(you will need this to thread the pearl)

Step 5:
*Now it should look like this.. :o)

Step 6:
*Thread the end threads with a needle that goes 
in the hole of your pearl...
*Decide what length your pearl will hang
*Sew up and down through the hole twice and knot the thread off.
(Tie well)
*Make a hanging loop of the starting thread...
*Fold out the bottom and top heart a little bit
And voila..
*Finished...:O)

Make lots and hang in your tree!!! :O)

Hope this easy little tutorial is easy to follow...
wish you luck... Have fun..:o)
Questions..
Just ask!!!


December 13, 2011

Sew Sew Merry Christmas

Here I am with my promise to you ...:O)

A free download for you all to use as you wish
 or wait until my girls have sewn the mystery finished...
will post a tutorial later of the finished  "thing" ...:O)
Hah.. now I really need to make it...lol...

So Merry Christmas to all of you from me!!!
Just click here or click on the picture at my sidebar

Questions... just ask!! :o)

Hope you will find time to make this little stitchery ...
and perhaps follow me along later with the tutorial!!

Happy Stitching!!!